Hi everyone! The room that seems to get the most likes and comments on my Instagram is… our Living/Dining Room! Which makes me happy because it is probably my favourite room (except maybe our dressing room…). Anyway, I have had a number of questions about the flooring we used, so I thought I would share some more detail on this, and a few cheeky before and after shots.

Our living and dining area were originally two separate rooms but at some point have been altered into one large room, which is great as usually the middle room for terraced houses is quite dark but being open plan it’s hugely improved the natural daylight in the dining room. When we bought the house, the room had a rather lovely beige carpet. Not only was this not to our taste but it was clearly old and worn, with large stains and frayed patches, as well as being fitted poorly. I’ve included some before photos for you to enjoy!


We lived with the carpet for around 10 months whilst we decided what to do with the space. Ideally we would have loved to lay parquet or herringbone flooring (eye heart emoji!), but this was wayyy out of our price range. We started ordering all sorts of samples for various types of flooring, including engineered timber and laminate…

Although we preferred the look of the engineered timber, we decided that as this isn’t our “forever home” it made sense to go with the cheaper alternative of laminate. I will openly admit I am very fussy and a bit of a perfectionist, so we spent hours looking in different shops and searching the internet for the perfect choice.
Eventually we decided on the Gawler Ash Effect Laminate Flooring from B&Q. For a while we were torn between two different laminates from B&Q – one an oak effect, and the ash effect. We settled on Gawler as we felt the ash was more neutral and sits well with our minimal, simple style. We bought a pack of the flooring and laid it in the dining room to make sure it was “the one”, as the samples they send are far too small for you to really be able to tell…

It works out at around £10 per square metre, which is a significant saving compared to the engineered boards we were looking at. I am not sure of the exact cost but we think it totalled around £800 for the two rooms including the cost of the underlay.
It took around 3 days to complete. This included all the prep work so removing the old carpet and underlay, prepping the existing floorboards, and laying the new flooring and underlay. It was a fiddly as we have two chimney breasts and 3 radiators to work around! In hindsight there was probably more work involved than we had anticipated, but by doing it ourselves we saved a huge amount of money. And everything always takes longer than you think.
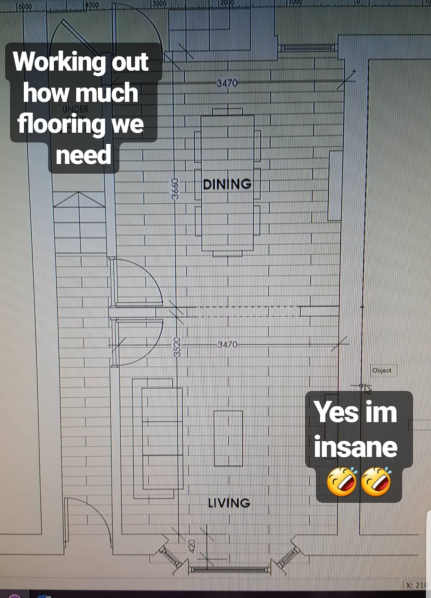
We also spent quite a bit of time planning the layout, as we had never laid laminate or any kind of flooring before (eek!) and as they say, “failure to prepare is preparing to fail”. I created a floor plan and overlaid the sizes of the boards so we knew exactly how many we would need, and had a cost estimate and knew how to set it out before we started!
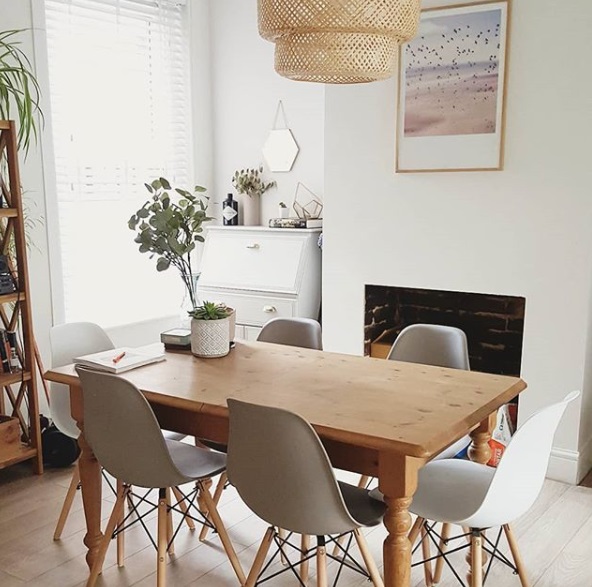
We are really pleased with the overall result and I must admit it turned out better than I had expected. The room now has a light and airy feel to it, and it works well with most of our other furniture.
We still have some work to do to finish off these rooms, including tiling our hearths and a few other bits, but it’s coming together now!
Hannah x
Please note, this post contains affiliate links.
